 Whether for the Super Bowl or for any dinner, to make real [good] barbecue you need to start with the right approach. Tender ribs are achieved by cooking the ribs low and slow over barbecue woods which provides that sweet and sultry smoked flavor that is synonymous with BBQ. If you're using a WSM, BGE, pellet smoker, offset or otherwise then you already know what I'm talking about. Otherwise you'll need to hear words like "hickory-smoked" or "mesquite-flavored" to even understand how ribs are truly made.
Don't get me wrong, you can cook ribs in your oven, but trust me when I say you're missing out. There are much better ways to cook ribs and it's easy to do. In the absence of a smoker you can cook ribs on a gas grill using a smoker pouch or smoker box on a two-zone setup. However, I highly recommend you check out my equipment link to see what you should look into for getting started in BBQ.
 Ribs are undoubtedly why you fell in love with barbecue. This recipe is a great and nearly foolproof way to make some amazing barbecue ribs. This follows the 2-1-1 ribs method (with a twist). If you aren’t familiar with the term, it's a 4 hour cooking process: 2 hours at 225°F with smoke, 1 hour covered with liquid and then 1 hour uncovered again.
This is an alternative approach to barbecuing ribs without having to spritz the ribs every 30 minutes. Try them both ways and see which way you like them best. Both ways just add moisture straight to the ribs while cooking.
2-1-1 is a popular way of doing ribs and the foiling or "Texas Crutch" is a little trick from competition barbecue. I picked this recipe up from a small BBQ joint and loved the simplicity. I later heard that others are adding Tiger sauce to it and it's a great addition. I've heard this trick is attributed to Johnny Trigg (part of an award winning competition barbecue team – Smokin’ Triggers). I can't speak to the validity of that, but it sure does amp up the flavor of the ribs.
What to Look for When Buying Pork Ribs
To start you'll need to choose a good quality rack of ribs. This recipe works well with baby back ribs or St. Louis-cut ribs (cut from spare ribs). See the Pork Rib Cuts link to see the differences and how to trim spare ribs down to St. Louis cut ribs - it only takes a minute or two and you can freeze the trimmings to make rib tips later.
The Pork Rib Cuts link goes into greater detail, but here are the things I look for when buying ribs:
- No large caps of fat. Marbling or small white stripes of fat are best.
- Avoid "shiner" or ribs trimmed too close to the bone.
- Avoid poorly cut or halfed racks
- Avoid "enhanced" ribs (same reason as the Smoked Turkey recipe - we want to control the flavor/texture).
Preparing Ribs
There is an impermeable membrane on the back side of the bones that will keep your spices and smoke from the meat. If it's there you'll see a milky white layer on the back of the bones. After removed you can see what looks like stripes of red and white between the bones. There are a few simple tricks to remove the rib membrane. Just click on that link for info/videos, but basically you can work a butter knife or spoon handle beneath then use a paper towel to get a grip on it.
Trim up any loose edges. If using spare ribs trim down to St. Louis cut ribs. Trim the meat to square up the ribs and remove any large areas of fat.
Directions
This recipe is a play off of the 2-1-1 ribs method. This means cook at 225°F with smoke for the first 2 hours. Then cook 1 hour wrapped in foil with our ingredients above. Then 1 more hour unwrapped to firm the meat back up a little. If this is your first go at it try just adding wood for smoke during the first 2 hours. It won’t be needed during the foiling. You may have to adjust to suit your smoker, but start with 2-1-1 as a template and go from there.
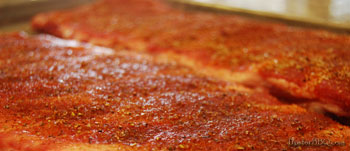 1) One to two hours before cooking rub the ribs with 2-3 tbsp of my Rib Rub or your own favorite. If you do the back side and then let sit for a minute or two it will stick on better. Then flip the rack and get the other side. Wrap them up with saran wrap and then place them back in the fridge to "marinate" in the rub until ready.
2) Fire up your smoker/grill to 225°F. I will normally crank it up to around 300°F and then lower it back down when ready, but this easier said than done on some smokers. You will want to keep your temperature steady between 225-250°F during the entire process. For the bbq wood I normally use a mix of oak/hickory or pecan, but go with your preference here.
3) Place your ribs in the indirect zone (away from flames) on your smoker/grill. Cook the ribs for 2 hours uncovered. Putting the rub on early allows some moisture to be pulled to the surface. This does several things. Namely it helps form the "bark" and it will keep the ribs from drying out during this first phase.
4) For the next hour we will wrap the ribs up in foil, but instead of apple juice we will use butter, brown sugar, honey and a little tiger sauce. Take the ribs off the smoker and lay them bone-side down on a layer of foil. Spread a little squeezable Parkay on the ribs. Then add 1/4 cup of warm honey on top. Then take a generous handful of brown sugar and cover the entire rack. Then pour a little bit of tiger sauce from one side to the other. I’ve also seen this done to both sides of the rack. If you want to try that you lay down a bed of honey/brown sugar and then place the ribs meat-side down on top. Then apply the butter, honey, brown sugar and tiger sauce to the back-side. I don’t notice a big difference either way, but I’ll let you be the judge.
5) Double-wrap the ribs with the foil and place them back on the smoker for 1 hour (no smoke).
6) After the hour un-wrap the ribs. All the ingredients will have melted down into a thin sauce. Take care to slowly un-wrap the ribs. Remove them from the foil and you can pour the juices overtop of the ribs.
7) Continue to cook uncovered for the next 45 minutes. Then start checking for "doneness" every 15 minutes until ready. Every rack will be slightly different and St. Louis cut ribs may take another 30-60 minutes longer (depending on size).
There are several different methods people use to check for doneness. You can grab to adjacent bones in the middle and pull – if they separate easily then they’re ready. Another good test is the bounce test. Pick up the ribs with a pair of tongs and gently bounce them – if they are ready they will bend and the meat will start to crack across the surface. Some say to go by the way the meat pulls back off the bone, but I say this can lead to overcooked ribs. It is highly temperature driven and is least related to the texture/tenderness or the rib meat.
8) If you like your ribs "wet" then you can start mopping them when you start checking for the doneness above. Alternatively you can mop when they’re deemed to be done and then crank up the heat to around 400°F for a few minutes to set the glaze. Be careful to keep a close eye as your caramelized BBQ sauce can go from perfect to carbon-ized in a matter of under 1 minute. To be the most accommodating to your guests I would recommend applying a thin layer of sauce or serve it on the side and let the ribs speak for themselves.
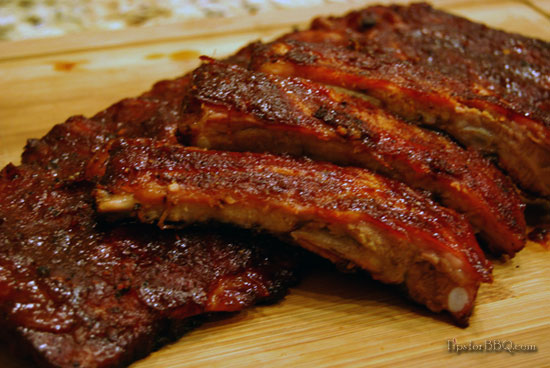
9) When done, allow the ribs to rest loosely covered for 10-15 minutes and then ENJOY!!
